The idea that use Travis CI to autoupdate GitHub pages is based on a post of IIssNan who also built NexT, the great theme that I am using.
Link to the original: http://notes.iissnan.com/2016/publishing-github-pages-with-travis-ci/
Introduction
Again, KevinZ recommond this autoupdating method to me. And for better understanding and future use, I decided to write the whole process down in my own way.
Auto-updating enables you to build your blog without setting up the entire environment in a new computer. All you need to do is pull your repo back, change it, and then push it back. That simplify the posting process if you have to work in multiple locations.
Principle
I’d like to skip the thinking part and focus on the method itself.
First of all, the whole process includes several steps:
git pushchanges to the remote repository on Github- Travis CI notice the changes and build the project
- Travis CI export output to Github branch
- Github build Pages
- All done and celebrate!
According to IIssNan, the original author, it’s quite easy except Step 3.
But, I am not farmiliar with Travis CI either, so that’s where I am going to start.
Travis CI
Travis CI is a hosted, distributed continuous integration service used to build and test software projects hosted at GitHub.wiki
Travis CI settings
Good thing is, Travis CI is well-documented. To get started, you may want to sign in and synchronize your special repositories from GitHub first. That can be done simply by clicking on the slide-bar of your projects.

Next, click on that gear to set for the project.
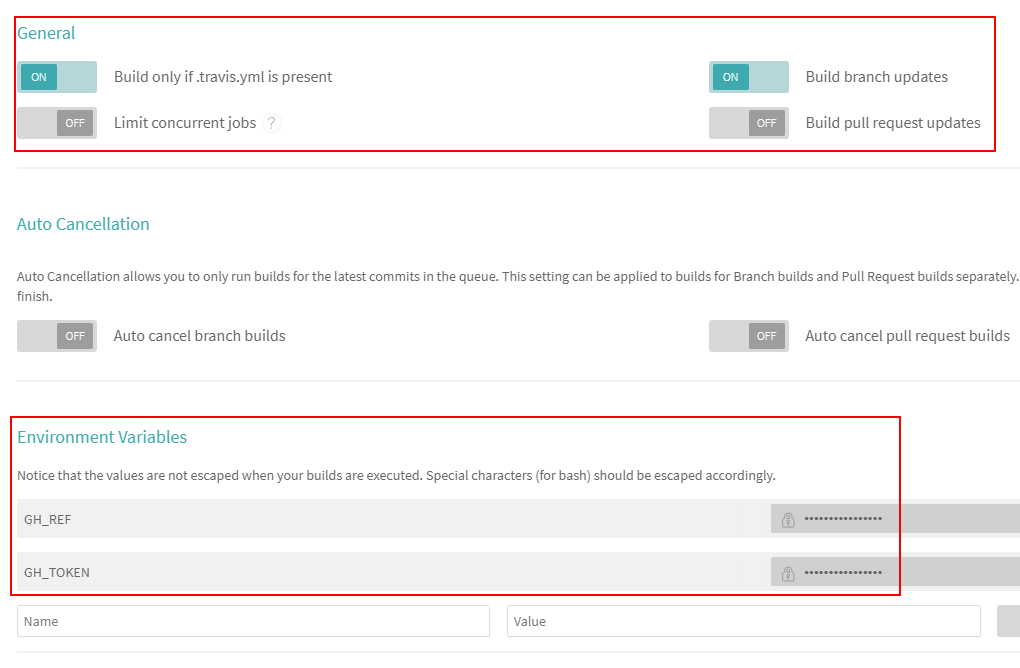
You have to add environment variables GH_REf and GH_TOKEN and use them in your .travis.yml for Travis-CI to push the build result to your project.
GH_REF is something like github.com/username/repo.git.
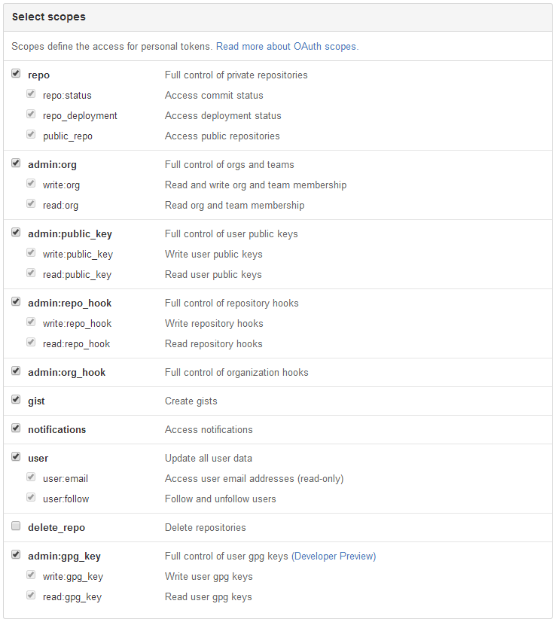
And GH_TOKEN can be generated in your own github settings.
.travis.yml
Then, add a .travis.yml file to your repository to tell Travis CI what needs to done for building. I’d like to post my .travis.yml for your reference here.
1 | language: node_js |
Push source code to the repository
Now, all you need is cd to your blog root and push it to the remote repository.1
2
3
4
5
6
7
8# cd ${YOURPATH}/blog
git init
git config user.name "USERNAME"
git config user.email "USEREMAIL"
git add .
git commit -m "Update docs"
git push --force "https://github.com/USERNAME/REPO.git" master:source
#if you put your source code in branch source
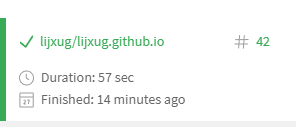
Then, you can go to your travis-ci site to check the status of building. If it looks like the graph below, then you can celebrate for a while.
PS. if after script: ... git push ... failed, it will still report build pass. Be careful about that.
版权声明: 本博客所有文章除特别声明外,均采用CC BY-NC-SA 3.0 CN许可协议。转载请注明出处!